Steps
Before accessing your Pi Wallet, please download the new “Pi Browser” app from the iOS App Store or Android Play Store. Make sure to download the “Pi Browser” developed by Pi Community Company. To download the correct app, you can also follow the steps below later.
- Open the Pi Network mining app (the Pi mining app you normally use).
- Go to the menu ☰ in the top left and select “Pi Browser”.
- Read the instructions and tap the “SIGN IN TO PI BROWSER” button.
- If Pi Browser is installed, it will automatically open and sign you in. If not, you will be taken to the app store to install and open Pi Browser.
- For some Android users, the link may open in your phone’s default browser instead of Pi Browser. In that case, you will need to manually open the Pi Browser app.
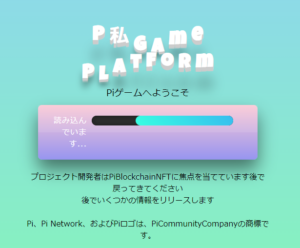
- The easiest way to sign in to Pi-related apps on Pi Browser is by using the mining app as instructed in the last step. However, you can also sign in directly to Pi Browser independently. In that case, type mine.pi in the Pi Browser URL bar, select “Use other sign-in methods”, and enter your Pi Network credentials.
- Once you are signed in to Pi Browser, you will see a welcome page with a “wallet.pi” icon.
- Click on the “wallet.pi” icon.
- Click on “GENERATE WALLET”.
- Please save your passphrase in a safe place. You can make it accessible only on your smartphone via fingerprint authentication for Android or Touch ID/Face ID for iOS, or copy and save it in a secret safe place. The passphrase is like a long string “password” that serves as the private key for your crypto wallet. If you lose this key, you will lose access to your wallet and will not be able to recover it. Therefore, do not lose your passphrase and make sure no one else can access it.
- If you did not set up biometric authentication when creating your wallet, you will need to use “UNLOCK WITH PASSPHRASE” to set up biometric login (e.g., fingerprint or facial recognition).
How to Use Your Pi Wallet
Once you log in to your Pi Wallet, you will see the balance page. A new wallet contains 100 Test-Pi. Test-Pi is not real Pi, has no value, and is for testing purposes only.
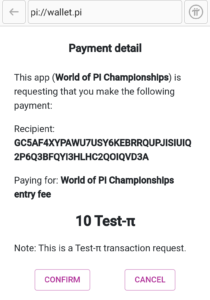
- To send Test-Pi, tap the orange “SEND” button. On the Test-Pi sending page,
- In the “Recipient Address” field, enter the wallet address of the person you want to send Test-Pi to. (A new feature will be added in the future that allows you to send Test-Pi using only the username)
- In the “Amount” field, enter the amount of Test-Pi you want to send.
- The “Fee” field is set to the current minimum fee on the Pi Testnet, 0.01 Test-Pi, by default. You can increase the fee if you want to prioritize your transaction during high traffic.
Note: Your wallet balance cannot go below 20 Test-Pi. Transactions that would result in a balance less than 20 Test-Pi will fail. Instructions on how to request additional Test-Pi are located below the “Receive” button.
- Tapping the “History” link will show you the history of all incoming and outgoing transactions from your wallet. The same transaction history is also recorded on the Pi Testnet blockchain.
- Tapping the “Settings” link will allow you to associate a biometric authentication login solution with your wallet (if you haven’t already). E.g., you can use fingerprint authentication (Android) or Touch ID/Face ID (iOS) to access your passphrase and log in to your wallet.
- To find your passphrase, tap the “SHOW” button. Do not share your passphrase with anyone and keep it secret.
- To see your wallet address, click the “Receive” button.
Currently, you can copy and share your wallet address. For example, you can paste it into a text or email message and send it. In the future, a feature will be added that allows you to share your wallet address via social media, email, etc., using the “SHARE” button. Since the blockchain is public, revealing your wallet address does not compromise the security of your wallet. - If you have sent all your Test-Pi and want to continue testing transactions, you can tap the link at the bottom of the Send or Receive page to request an additional 100 Test-Pi. This option is available every 48 hours and is only valid if your balance is less than 50 Test-Pi.